
Adventure Time Humanized (adventure time humanized): A Guide to Portraits
So, what exactly is the "Adventure Time humanized" art style? It’s a super popular trend, born straight from the fan community, that reimagines the show's characters as if they were real people. It swaps out their cartoonish looks for more human traits but—and this is key—it holds onto that signature noodle-limbed charm and those simple, expressive designs we all love.
Welcome To Ooo: Your Guide To A Custom Portrait
Ever find yourself wondering what you, your friends, or even your dog would look like hanging out in the Land of Ooo? You're definitely not alone. The pull to connect with that whimsical, weird, and wonderful world has been massive since the show first captured our imaginations.
When Adventure Time first hit our screens back on April 5, 2010, it was an instant phenomenon, pulling in 2.5 million viewers and giving Cartoon Network a huge ratings boost. That audience just kept growing, eventually peaking at a whopping 3.435 million for the fifth season premiere. This explosion in popularity fueled a serious demand for tangible pieces of Ooo, from official merch to custom art. You can dive deeper into the show's cultural footprint on the Adventure Time Wikipedia page.
Why The Humanized Style Just Works
The real magic of an Adventure Time humanized portrait is how it mashes up pure fantasy with your personal reality. It’s about so much more than just drawing someone with noodly arms; it's about channeling their unique personality through the show's iconic artistic language.
Think of this guide as your treasure map to commissioning a one-of-a-kind portrait. We’re going to walk through everything you need to know to get a piece of art that looks like it was plucked right out of a storyboard. Our whole goal here is to make this process fun and straightforward, whether you're creating an unforgettable gift or just treating yourself to a personal keepsake.
A great humanized portrait doesn't just copy the art style; it captures the essence of a person's spirit. It asks, "If this person were an adventurer in Ooo, who would they be?"
This journey is about more than just aesthetics. It’s a chance to see yourself through a different, more adventurous lens.
Here's what we'll break down together:
- The core elements of the show's visual design.
- How to translate real people (and pets!) into cartoon form.
- Tips for picking the perfect poses, outfits, and backgrounds.
- A complete checklist for commissioning your art with zero guesswork.
By the time we're done, you'll have all the tools you need to bring your vision to life. Mathematical
Deconstructing The Adventure Time Art Style
Before you can nail that perfect Adventure Time humanized portrait, you've got to get what makes the show's art tick. Its charm is all in its deceptively simple style—it feels playful, sure, but it's also incredibly deliberate. Knowing these core ingredients gives you the right words to use when talking to an artist.
The first thing most people notice is the character design. Everyone is built from soft, flowing shapes, with those famously long, bendy limbs often called "noodle arms" and legs. This isn't just a quirky choice; it's what allows for such fluid and expressive animation, letting characters move with an exaggerated, almost graceful energy. The style steers clear of sharp angles and rigid joints, giving everyone a relaxed, boneless vibe that's central to the show's whole feel.
The Power of Simple Features
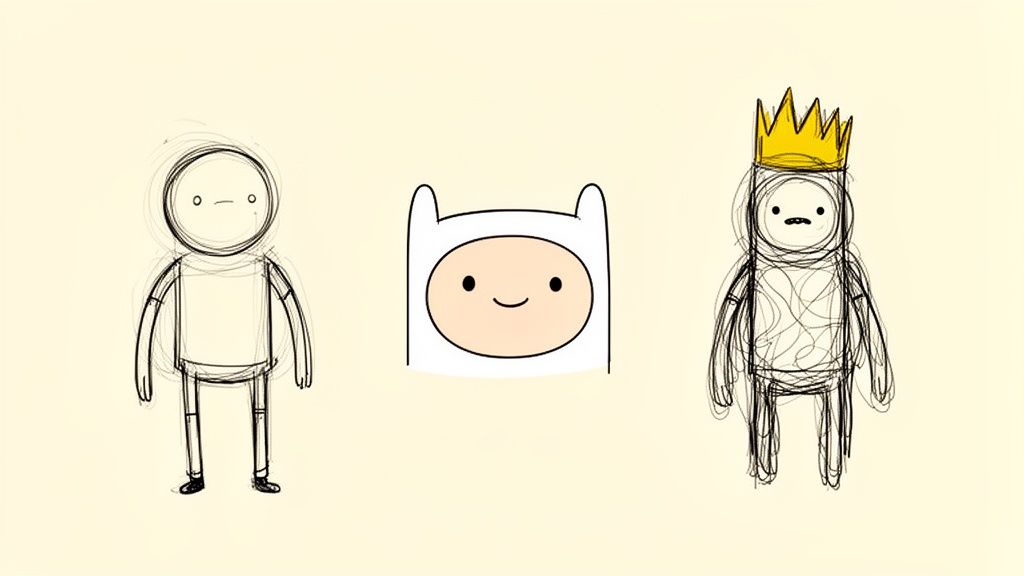
Then you have the faces. Most of the human characters, especially Finn, have incredibly basic features. We're talking two small, black dot eyes and a simple line for a mouth. That's it.
But this minimalism is pure genius. The artists manage to show a huge range of emotions—from pure joy to absolute terror—just by tweaking the curve of the mouth or the placement of the eyes. It's proof that you don't need a ton of detail to make a character feel real and relatable. It's a principle seen in other styles, too; our guide on South Park art shows how another iconic show uses minimalism to create its signature look.
The genius of the Adventure Time style is its ability to communicate deep, complex emotions through the simplest possible lines. A single curved line can represent Finn's ecstatic yell or his quiet contemplation.
This approach keeps the characters expressive without sacrificing their clean, cartoonish appeal. When you're thinking about your own portrait, just remember that sometimes, less is way more.
Lines Colors and Textures
The show's visual language also comes through in its line work and color choices. The art uses clean, consistent black outlines that have a slightly wobbly, hand-drawn quality to them. This imperfection is intentional, giving everything a warm, organic feel that you just don't get from slick, computer-generated animation.
The colors are usually bright, flat, and saturated, with very little complex shading or gradients. This "cel-shaded" look is a huge part of what makes the Land of Ooo feel like a vibrant, storybook world. It also helps characters and key objects pop against the detailed backgrounds.
To make it easy, here’s a quick breakdown of the core artistic traits you'll want to keep in mind.
Key Adventure Time Artistic Traits
This table sums up the essential visual elements that define the Adventure Time style. Use it as a cheat sheet when discussing your portrait with an artist!
| Artistic Element | Description | Example From the Show |
|---|---|---|
| Noodle Limbs | Long, flexible arms and legs that bend without clear joints. | Finn’s wildly swinging arms during a sword fight. |
| Dot Eyes | Simple, small black circles for eyes on most human characters. | Princess Bubblegum’s default focused expression. |
| Clean Line Work | Consistent, slightly imperfect outlines that feel hand-drawn. | The wobbly outline of Jake as he shapeshifts. |
| Flat Colors | Solid, vibrant color fills with minimal shading or gradients. | The solid pink of the Candy Kingdom’s architecture. |
Getting a handle on these key pieces is the first step toward creating something that feels like it was pulled right out of Ooo. By recognizing what makes noodle limbs, simple faces, and flat colors work so well together, you’re all set to start translating real people into this wonderfully weird style.
Bringing Real People and Pets Into the Cartoon World
So, how do you translate a real person into the Land of Ooo? It's all about selective simplification. The goal isn’t to slap some noodle limbs on a photorealistic copy; it’s about capturing someone’s essence and filtering it through the show's charmingly minimal style.
A skilled artist knows to look for a person's most defining characteristics and then figure out how to represent them with the show's visual rules. Think of it like boiling a complex sentence down to just a few key words. That distinct mole, a signature pair of glasses, or that unique hairstyle—these are the anchors that make the cartoon version instantly recognizable.
The whole process hinges on good source material. Seriously, your reference photos are the single most important tool you can give an artist.
Selecting The Perfect Reference Photos
Choosing the right photos is half the battle. You’re looking for images that are clear, well-lit, and—most importantly—show off the subject's personality. A blurry, dark photo from across the room just won’t give the artist much to work with.
Here’s what you should be looking for when picking your shots:
- A Clear Headshot: This one is non-negotiable. The artist absolutely needs a straight-on or slight three-quarter view of the face. Make sure it's free of deep shadows, sunglasses, or heavy filters, as this is how they'll nail the likeness.
- Photos Showing Personality: Is the person always laughing, looking thoughtful, or making a goofy face? A photo that captures their natural expression is gold. It helps the artist infuse the portrait with genuine character.
- Full-Body Shots: While the face is key, a full-body photo helps the artist get the proportions, posture, and outfit details right. It gives them a sense of the person's overall presence.
The best reference photo feels authentic. It’s that one picture that makes you say, "Yep, that's so them." That authenticity is exactly what the artist will translate into the final Adventure time humanized artwork.
Simplifying Features The Ooo Way
Now for the fun part: adapting real-world complexity to cartoon simplicity. Some features need a bit of a creative touch to fit the Adventure Time style without getting lost in translation.
Take a thick, bushy beard, for example. It won't be drawn with thousands of individual hairs. Instead, an artist might render it as a single, solid shape with a slightly wavy outline—much like the Ice King's iconic facial hair. Intricate curly hair can be simplified into a collection of soft, rounded shapes that just suggest volume and texture.
Glasses are another great example. They become bold, graphic shapes rather than detailed frames with lenses. The key is to maintain the signature silhouette of the feature while stripping away all the unnecessary detail. This approach is what makes the final portrait feel like it truly belongs in Ooo.
The show's massive appeal has fueled a merchandising boom since 2010, with everything from action figures to dishware popping up. This desire for a real-world connection to Ooo taps into a broader trend, too. The global adventure tourism market, valued at USD 464.3 billion in 2025, is projected to hit USD 1,764.87 billion by 2033. You can check out more about this growing market on Grand View Research.
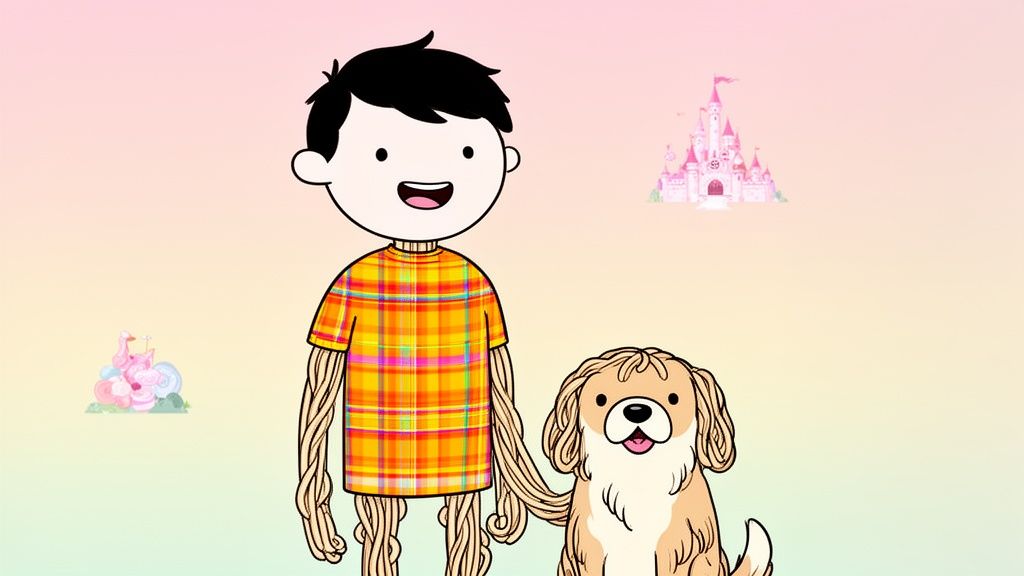
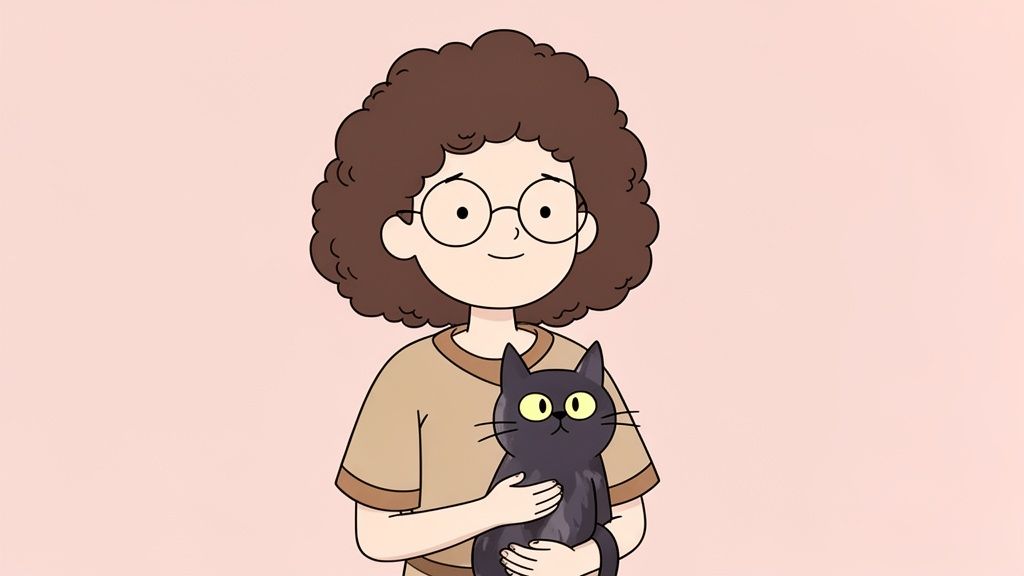
Don't Forget The Furry Friends
Pets are more than welcome in Ooo—they're practically citizens! Giving your pet an Adventure Time makeover is a fantastic way to include them in the fun. Just think about their personality. Is your cat aloof and cool like Marceline, or is your dog a loyal, fun-loving buddy like Jake?
These little personality cues can inspire their whole design. A heroic dog might get a brave, upright stance, while a mischievous cat could have sly, expressive eyes. Capturing a pet's spirit is just as important as a person's. And for those who have crossed the rainbow bridge, these portraits can serve as a beautiful, lasting tribute. Our guide on pet memorial portraits has more ideas for honoring beloved companions through art.
Choosing The Perfect Scene, Pose, And Wardrobe
A great Adventure Time humanized portrait does way more than just capture a likeness—it tells a story. Getting the right mix of pose, wardrobe, and background is what turns a simple drawing into a dynamic piece of art that just screams personality.
Your journey into Ooo starts with the pose. Think about who you're turning into a character. Are they a bold, take-charge kind of person? A classic Finn-inspired heroic stance—chest out, hands on hips—might be the perfect fit. Or maybe they're more contemplative and creative, where a thoughtful posture like Princess Bubblegum's would suit them better. The pose is your first and most powerful tool for visual storytelling.
Translating Wardrobe Into Ooo Style
Next up is the wardrobe. You don't need a closet full of adventurer’s gear to look the part. The real trick is adapting everyday clothing into the show’s simple, iconic style.
That favorite flannel shirt can easily become an adventurer's tunic. A beloved hoodie can be drawn as a hero's cloak. The goal is to capture the vibe of the outfit, not every single seam and button. Stick to bold, flat colors and clean lines to keep it looking authentic.
- For a casual look: A simple t-shirt and jeans combo works perfectly. You could even add a small, stylized graphic to the shirt that represents a hobby or a fun inside joke.
- For a fantasy feel: Translate a dress into a princess gown or a jacket into a piece of armor. Just keep the shapes simple and the colors vibrant.
- Don't forget accessories: A signature hat, a favorite necklace, or even a backpack can add that extra layer of personal detail that makes the portrait uniquely theirs.
The best outfits in an Adventure Time portrait feel both familiar and fantastical. It's about finding that sweet spot where your real-world style meets the whimsical aesthetic of the Land of Ooo.
Setting The Scene With The Right Background
Finally, the background sets the stage and really pulls you into the world. A simple color gradient can look clean and modern, but a custom background inspired by the show will elevate your portrait to a whole new level of awesome.
The love for the Adventure Time universe is undeniable. Its comic book series, which ran with BOOM! Studios from 2012 to 2018 and is even set for a revival, shows a huge fan appetite for tangible art. This mirrors the show's peak viewership of 3.435 million, proving fans crave collectible pieces that connect them to Ooo. You can explore more about the Adventure Time comic series history) to see just how deep the fandom runs.
Imagine placing your characters in an iconic location from the show:
- The Candy Kingdom: Perfect for a sweet, playful scene with its vibrant pinks and cheerful architecture.
- The Ice Kingdom: Creates a cool, serene, or even mysterious atmosphere with its blue and white palette.
- The Grassy Lands: The classic choice for an epic adventure, complete with rolling green hills and a bright blue sky.
A well-chosen background gives context and really enhances the story you’re telling. For more inspiration on building iconic settings, our guide on The Simpsons backgrounds has some great ideas on how locations can define a cartoon world. Choosing the right scene makes your portrait feel like a genuine snapshot from an untold episode.
Your Commissioning Checklist for the Perfect Portrait
Alright, so you’re ready to bring your portrait idea to life with an artist. That’s the fun part! To make sure it all goes smoothly and the final piece is exactly what you’ve been dreaming of, a little prep work goes a long way. This checklist will walk you through exactly what to pull together for your commission request.
Think of your request as the creative blueprint for your Adventure Time humanized masterpiece. The clearer you are, the easier it is for the artist to nail your vision without a ton of back-and-forth. Start with the absolute basics: how many people and pets, what kind of background you're picturing, and whether you just need a digital file or a physical print.
Assembling Your Creative Brief
With the essentials out of the way, it’s time to get into the details—this is where you give the artist the creative fuel they need. A solid brief is the secret sauce for a successful commission. Trust me, it saves a ton of time on revisions and ensures you end up with a portrait you'll absolutely love.
Here’s what you should pull together:
- Reference Photos: Clear, well-lit photos are a must for each person and pet. A good headshot helps the artist capture their likeness, and a full-body shot is perfect for getting the pose and outfit just right.
- Pose and Expression Notes: Describe what you want each character to be doing. Are they striking a heroic pose together, sharing a hug, or just chilling out? Don’t forget their expressions—happy, goofy, adventurous, you name it.
- Wardrobe and Accessories: Get specific with the outfits and any key accessories. "A blue t-shirt and jeans" is a start, but "a royal blue t-shirt with a small rocket ship logo and dark wash jeans" is so much better.
The best commission requests find that sweet spot between clear direction and creative freedom. Give the artist all your "must-have" details, but then trust their expertise to pull it all together in that signature Adventure Time style.
This flowchart breaks down the key creative decisions you'll be making as you plan out the composition.

As you can see, the pose, wardrobe, and scene are the three pillars that build the whole story within your artwork.
Finalizing Technical Details
Once your creative vision is locked in, a few quick technical details will make sure the final product is perfect for whatever you have planned. Think about how you’re going to use the art. Is it going to be your new social media avatar, or are you printing a big poster for the living room?
For anything you plan to print, you’ll need a high-resolution file. Artists typically deliver work at 300 DPI (dots per inch), which is the gold standard for quality prints. You'll also need to decide on a file format.
- JPEG: A fantastic choice for digital use, like sharing on social media. The file sizes are smaller, but just be aware they can lose a bit of quality if you edit and re-save them over and over.
- PNG: This is your go-to if you want the artwork to have a transparent background. If you just want the characters floating in space with nothing behind them, a PNG is what you need.
- PDF: Often the best bet for professional printing. It does a perfect job of preserving quality and formatting, so what you see on screen is what you get on paper.
Sorting out these technical needs upfront means you’ll get a file that’s ready to go, whether you're printing it, posting it, or setting off on some other grand adventure with it. It takes all the guesswork out of the final step and guarantees your portrait looks sharp and vibrant, no matter the format.
To help you keep everything organized, I’ve put together a handy table that walks you through the commissioning process from start to finish.
Commissioning Your Portrait: A Step-by-Step Guide
Here's a simple checklist to guide you through ordering your custom art. Following these steps will help ensure no detail gets missed.
| Step | Action Item | Pro Tip |
|---|---|---|
| 1. Find Your Artist | Research artists on platforms like Etsy, DeviantArt, or Instagram. Look for portfolios that match the style. | Check their reviews and recent work to see how they handle likeness and character design. |
| 2. Review Their Terms | Read the artist’s commission info carefully. Look for pricing, turnaround times, and their revision policy. | Some artists offer a limited number of free revisions. Know the policy before you start! |
| 3. Prepare Your Brief | Gather all your reference photos, pose ideas, and wardrobe details in one place. | Create a simple document or email with everything clearly laid out with headings for each section. |
| 4. Submit Your Request | Contact the artist with your complete creative brief and all the basic info (number of characters, background, etc.). | Be polite and concise. Lead with what you love about their work to start things off on a good note. |
| 5. Discuss Pricing | Confirm the final price based on your specific request. Prices can vary based on complexity and number of subjects. | Ask if there are extra charges for complex backgrounds or additional props. |
| 6. Review the Sketch | The artist will likely send a rough sketch for approval. This is the best time to request major changes. | Focus on the big things like poses and composition. Color and minor details come later. |
| 7. Finalize and Pay | Once you approve the final artwork, complete the payment. The artist will then send the high-resolution files. | Keep the final files backed up in a safe place, like a cloud storage service. |
Using this checklist will make the entire process feel less like a chore and more like the exciting creative collaboration it’s supposed to be
Common Questions About Adventure Time Portraits
When you’re commissioning your very first Adventure Time humanized portrait, a few questions almost always come up. Getting those answers sorted out from the get-go makes the whole process smoother, way more fun, and ensures you end up with a piece of art you'll be obsessed with.
Let’s dive into some of the most common things people ask.
How Much Detail Should I Give The Artist?
This is all about finding that sweet spot between giving clear direction and letting the artist have some creative freedom. You definitely want to provide all the essential details that make the portrait feel personal and, well, yours.
Think about the must-haves: a specific t-shirt logo, that favorite hat they never take off, or distinct features like freckles and a particular pair of glasses. These are the details that anchor the portrait and make sure the likeness is spot-on.
But you don't need to describe every single fold in the clothing or the exact placement of every strand of hair. The whole point is to trust the artist to translate your real-world details into the show's charmingly simple style. For instance, instead of a long-winded description of an outfit, just mention the item and its color. This balance is where the magic happens, letting their artistic skill meet your vision.
Give the artist your non-negotiable details, but let them work their magic on the stylization. The best portraits come from a collaborative spirit where your vision meets their artistic expertise.
Can I Really Include My Pets?
Yes! A thousand times, yes! Pets are fantastic additions to any Adventure Time portrait and really make the scene feel complete. Artists are wizards at creatively weaving in furry, scaly, or feathery family members, turning them into genuine Land of Ooo characters.
To give the artist the best shot at capturing their spirit, send over a few clear photos and drop a hint about their personality. You could say something like, "Our golden retriever is goofy and loyal, a lot like Jake the Dog." That little bit of insight gives the artist a creative direction to run with, helping them draw your pet as a true adventurer instead of just an animal chilling in the background.
What Kind Of Reference Photo Works Best?
The quality of your reference photos has a huge impact on the final artwork. A clear, well-lit, high-resolution photo of the face is, without a doubt, the most important thing for nailing a strong likeness.
Here’s a quick checklist for picking your photos:
- Facial View: A straight-on shot or a slight three-quarter angle of the face is perfect.
- Clarity: Try to avoid photos with heavy filters, sunglasses, or deep shadows that hide key features.
- Full-Body Shot: While the face is priority number one, a full-body photo is also super helpful for getting the pose and outfit right.
Just think of the facial photo as the foundation for the whole piece—it’s the most critical tool you can give the artist.
Should I Get A Digital File Or A Printed Poster?
This one really comes down to what you plan to do with your awesome new portrait.
A digital file is a high-resolution image that gives you a ton of flexibility. You can use it as a social media profile pic, a phone background, or even print it yourself on all sorts of things like mugs, shirts, or stickers.
A printed poster, on the other hand, is the finished product. It’s a physical, ready-to-hang piece of art that shows up right at your door. If you know you want something to display on your wall right away, a poster is a convenient and beautiful choice. If you're all about versatility and want to use the image in a bunch of different ways, the digital file is your best bet.
Ready to see yourself in the Land of Ooo? At Happy Tooned, our professional digital artists handcraft custom portraits that capture your unique personality in the iconic Adventure Time style. We offer unlimited revisions to ensure every detail is perfect. Start creating your personalized adventure today!